
WWW.SKULLFORGESCENICS.ETSY.COM
Saturday, May 9, 2015


Thursday, May 7, 2015
Vanguard Conversion Commission
One of my clients contacted me to help him finish off a conversion he was working on. Michael wanted his Vanguard warjack reposed to resemble this illustration by Andrea Uderzo:
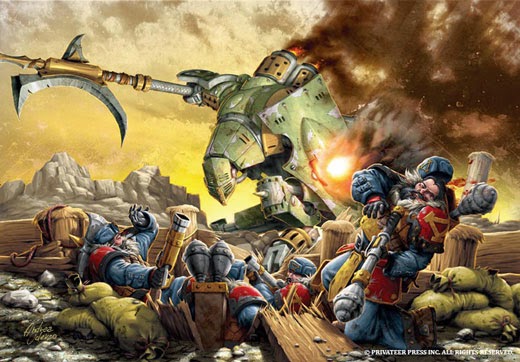
Mike had already cleaned the parts and reposed the halberd arm, replacing its pistons with brass rod. That's where he turned the model over to me.
Here's the final result:


I puttied the shoulders to accommodate the new positioning. For the midsection, I cut apart the pistons that make up the Vanguard's waist and pinned them back into place with a twist to angle the pelvis and add a slight turn in the upper torso. To turn the head, I needed to remove the neck post and resculpt it off to one side. The new connection point for the hose under the Vanguard's chin was made with a bit of styrene tube that the hose plugged into.
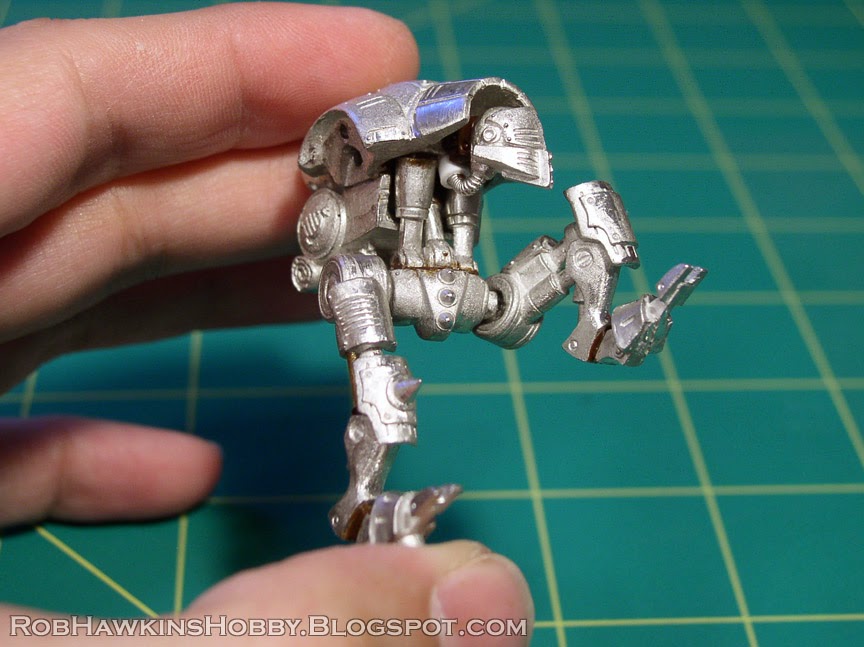

Surprisingly, getting the left leg up on the trench wall didn't require any modification to the knee and pistons other than flexing it to get as much bend as I could. The right leg, however, needed to be completely reposed to extend the 'jack up to its full height. The top piston was cut and rotated to the top of the knee hinge. The lower piston needed to be replaced with thick bras rod. A little sculpting was required to repair the joins. I also cut and repositioned the attachment points on both feet.


The base was actually the last part I worked on. Once I figured out how high the left leg would be, I modeled the mound with Aves Epoxy Sculpt and then detailed it with basswood strips and ballast. The sandbags were also sculpted from Aves.


Michael was really happy with the finished model. If you would like to commission me to tackle a conversion idea that you have, shoot me an email at robhawkinsart@gmail.com or message me on my Facebook page, The Rob Hawkins Hobby Blog.
'Til next time!
Tuesday, May 5, 2015
Painting a Plethora of Plague Monks, Part 2
In part one of this article, I showed you how I prepared the bases in a single large batch. The models were assembled separately on foam core strips so I could paint them with an assembly-line technique.

To start off, I primed the models black. Since the plague monks are mostly covered by their thick robes, I sprayed them with Model Masters Medium Green. After that it was a top-down spray of Tamiya Olive Green. (I had a really difficult time trying to find sprays that produced a nice gradient of green. They all seem to jump from a really dark olive up to a bright camo green.)

With all the models sprayed, it was time to pull out the brushes and go to work.

I gave the models a very dry drybrush that was a mix of Vallejo Golden Olive, cut with a little GW Castellan Green to catch some of the raised areas and punch up the highlights a bit. A final highlight line was painted along the edges of the hoods, sleeves, and collars using the same mix with a little more Golden Olive. I just hit the edges with the side of my brush and didn't go crazy since the detail would mostly be lose in the sea of 40 models.
On the bottoms of the robes, I drybrushed some mud using P3 Gun Corps Brown and a little P3 Battlefield Brown.

Then I started with the backs of the models. The tails were basecoated with Vallejo Game Color Heavy Skintone and then overbrushed with a mix of Heavy Skintone and Vallejo Model Color Iraqui Sand. I also picked out any areas of skin poking through using the same two-color process.
Bits like the wrappings, patches, scrolls, and rope belts were basecoated with P3 Rucksack Tan. The scrolls were then highlighted up with P3 Moldy Ochre and GW Screaming Skull.
Some of the monks have spikes and skulls on their hoods or belts, and these were painted with Screaming Skull and quickly hit with a highlight of P3 Menoth White Highlight. The metal bits on the belts and the rivets holding some of the scrolls in place were painted with straight GW Leadbelcher.

Next, I washed all of these areas with brown ink.

Since the monks' faces are mostly covered, painting them went pretty quickly. I used the same two-color process for the skin. and picked out the teeth with Screaming Skull. To paint the fur, I used P3 Bloodstone, darkened just a little with Battlefield Brown. I also painted the fur on their arms at this stage.
The faces were washed with brown ink and and then the space around the hood, and their noses were painted black.

At this point I only had the hands, weapons and feet to finish. I started popping the models off the strips so I could get at those hard-to-reach areas. The hands were basecoated and then the highlight color brushes across the fingers. The hilts of the swords were painted with gold or brown depending on whether they were metal or wooden. The blades were painted with Leadbelcher and a the edges highlighted with P3 Quick Silver. I picked out the claws on the hands and feet with straight Screaming Skull.

The weapons, hands, and feet were washed with brown ink and then the bottoms of the robes were painted black, including a little point of black in the tears along the edges.

The wooden staffs were painted with straight Gun Corps Brown. The scrolls were painted as above– Basecoated with Rucksack Tan and then highlighted with Moldy Ochre and Screaming Skull.

Finally, the staffs were washed with brown ink.

Once all of the models were painted, I started gluing them to the bases, making sure everyone ranked up neatly.

For the final touch, I painted some runes and Skavenscript on the scrolls with a mix of black paint thinned with brown ink.

A little extra attention (but not much) was given to the command models.


All that remained was the glamor shots. The frenzied monks and their plague priests are eager to get into battle and spread the glorious word of Clan Pestilens!


'Til next time!
Subscribe to:
Posts (Atom)